
Sublimation paper is not usually the most expensive part of a job, but wasted sheets, poor nesting, borderless printing problems and incorrect canvas setup can still cost time, money and frustration.
This guide explains how to create a sublimation print page for A4, US Legal, A3 and larger paper sizes, including the safe print area, 3mm margins, 300 DPI setup, colour profile choices and how to nest multiple designs onto one sheet.
A sublimation print page is the canvas you prepare before printing your sublimation transfer. Instead of opening each image and printing it separately, you create one correctly sized document and place multiple print-ready designs onto that page.
This process is often called nesting or ganging. The goal is to use as much of the printable area as possible while still leaving enough space for trimming, alignment and safe handling.
For example, if you are printing keyrings, phone case inserts, small labels, coasters or mug designs, you can often fit multiple items onto one A4 or US Legal sheet instead of wasting a separate sheet for every product.
A well-prepared print page helps reduce paper waste, improve layout consistency, make production easier and avoid common mistakes such as printing too close to the edge of the paper.
Start with the physical sublimation paper size you will load into the printer, such as A4, US Legal, A3 or A3+.
Reduce the usable canvas size by leaving a margin around the page. We recommend 3mm per side for most desktop sublimation workflows.
Place your designs onto the canvas, rotate where practical, leave trimming space and avoid printing designs too close to the paper edge.
Your canvas should be based on the paper size you are actually using, minus a safe margin. For desktop sublimation printers, this matters because the paper may not feed perfectly straight every time.
| Paper size | Physical paper size | Suggested safe canvas size | Best use |
|---|---|---|---|
| A4 | 210mm × 297mm | 204mm × 291mm | Mugs, coasters, phone cases, keyrings, labels, small blanks and general A4 production. |
| US Legal | 216mm × 356mm | 210mm × 350mm | Longer designs such as 20oz tumbler wraps, larger mug layouts and better use of desktop printer width. |
| A3 | 297mm × 420mm | 291mm × 414mm | Larger blanks, apparel panels, multiple smaller items and wider nesting layouts. |
| A3+ | 329mm × 483mm | 323mm × 477mm | Oversized sheets, larger transfer layouts, bigger product templates and production batching. |
A 3mm margin on each side means you subtract 6mm from the total width and 6mm from the total height. For A4 paper, 210mm × 297mm becomes a safe working canvas of 204mm × 291mm.
Borderless printing sounds useful because it appears to give you more printable area, but it can cause problems in sublimation workflows. Printers that print borderless often overspray slightly past the edge of the paper or rely on feed adjustments that are not perfectly repeatable.
On small-format inkjet printers, this can leave ink or sublimation residue on guides, rollers or pizza wheel marks inside the printer. Over time that can create smudges, tracking marks, feed issues or unwanted ink marks on later prints.
A smaller, cleaner print area is usually better than a messy borderless print that risks marking the inside of your printer.
For production work, predictable paper feed and clean transfers matter more than using every last millimetre of the sheet.
The same logic applies in other design programs, but Photoshop is a common choice for sublimation print layouts because it allows accurate document sizing, DPI control and colour profile management.
Open Photoshop and create a new document based on the safe canvas size for your paper. For A4, use 204mm × 291mm. For US Legal, use 210mm × 350mm.
Set the orientation to portrait or landscape depending on the artwork you are placing. You can create both portrait and landscape templates if you use both regularly.
Use 300 pixels per inch for most sublimation print artwork. This gives you enough image data for sharp transfers on mugs, panels, fabric, desk mats and most common sublimation blanks.
Low-resolution artwork may still print, but it can look soft, pixelated or blurry once pressed onto the final product.
For many sublimation workflows, it is best to design in RGB and allow your printer profile / sublimation ICC workflow to handle the conversion to the printer’s ink output. Many users prefer Adobe RGB (1998) as a wider RGB working space for print preparation.
Photoshop colour settings and working spaces can be managed through Adobe’s colour settings workflow. You can read Adobe’s guide here: Adobe Photoshop colour settings.
Important: your document working profile is not the same as your printer ICC output profile. Your printer, ink, paper and press workflow still need the correct output profile and print settings.
Once the blank page is set up, save it with a clear name such as A4 Sublimation Print Page 204x291mm 300DPI Adobe RGB.
Saving a reusable blank template helps prevent mistakes and speeds up production when you are printing the same paper sizes every day.
 A4 sublimation blank canvas settings in Photoshop.
A print page is the sheet you print on. A product template is the actual design area for a specific blank, such as a phone case, mug, coaster or mouse pad.
Read our related guide: Creating a Sublimation Blank Template.
Nesting is the process of arranging multiple pieces of artwork onto one print page. The goal is to use the sheet efficiently while keeping the transfer easy to cut, press and handle.
Most sublimation transfers are printed mirrored because the printed side is placed against the blank before pressing. Check your printer driver, RIP or design software settings before sending the print.
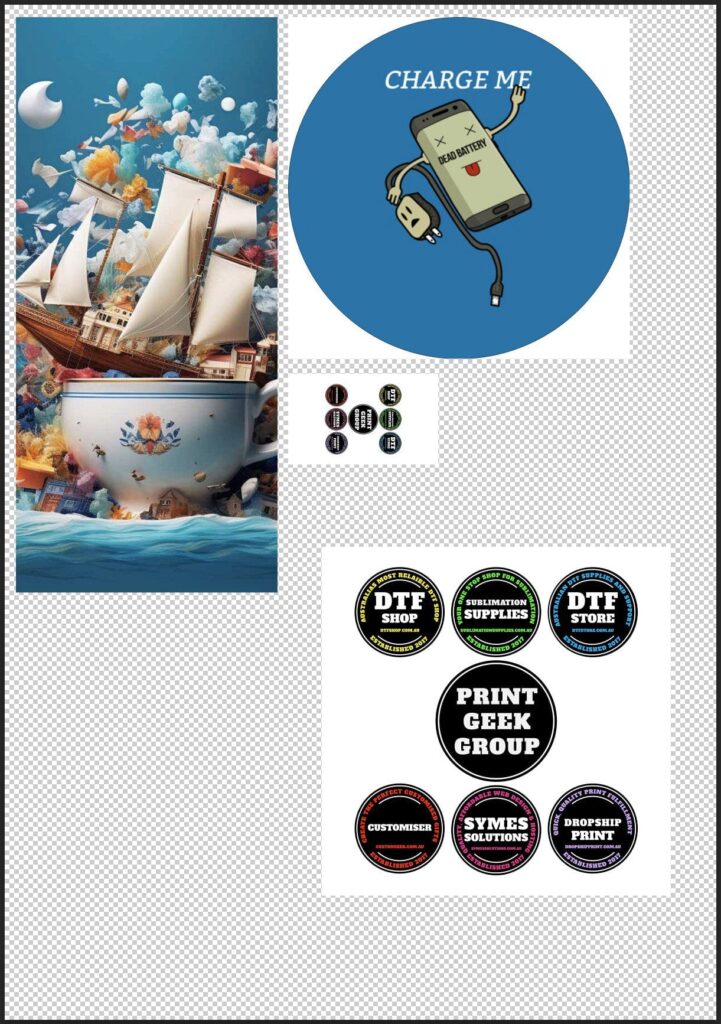 Example of multiple sublimation designs nested onto one A4 print page.
A4 is the most common desktop sublimation paper size. It is practical for mugs, coasters, keyrings, phone cases, labels, small gifts and many general sublimation blanks.
US Legal gives extra length compared with A4. On many desktop printers it can be a helpful option for longer artwork, including 20oz tumbler wraps and larger mug designs.
A3, A3+ and roll media are better for larger blanks, larger apparel layouts, desk mats, bar runners and more efficient production nesting.
Always check your printer’s supported paper sizes and driver settings before buying paper. Some printers support US Legal directly, while others may need a custom paper size set up in the print driver.
If you set the canvas to the full paper size and place artwork to the very edge, even a small paper feed shift can clip artwork or create edge marks.
Text, logos and directional designs can be ruined if they are not mirrored before pressing. Make mirroring part of your final print checklist.
A low-resolution JPG pulled from a website may look acceptable on screen but print poorly. Use high-resolution artwork wherever possible.
If items require different temperatures, times or pressure, ganging them together can create confusion during pressing.
Designs packed too tightly can be hard to cut apart cleanly. Leave space between designs, especially for curved blanks and wraps.
Colour is affected by the artwork profile, printer profile, ink, paper, blank coating and press settings. Keep your workflow consistent and test before production.
For active editing, save your working file in your design program’s native format, such as PSD for Photoshop. This preserves layers, guides, smart objects and editable artwork.
For printing, the best file type depends on your printer driver, RIP and workflow. Many users print directly from Photoshop, while others export a high-quality PDF, TIFF, PNG or JPG depending on the artwork and software.
Let the transfer dry if your workflow requires it, trim carefully, keep the printed side protected from moisture and fingerprints, and press using the time, temperature and pressure recommended for your specific sublimation blank.
Keep notes of successful print settings and press settings so repeat orders are easier to reproduce.
These related pages can help you build a more complete sublimation workflow.
A4 paper is 210mm × 297mm. We recommend creating a safe working canvas of about 204mm × 291mm, leaving a 3mm margin on each side.
Yes, if your printer supports it. US Legal paper is 216mm × 356mm and can be useful for longer designs, including some tumbler wrap layouts.
We do not recommend borderless sublimation printing for most desktop workflows. It can cause overspray, feed variation and ink marks inside the printer.
300 DPI is a good standard for most sublimation artwork and product templates. Low-resolution artwork can appear blurry or pixelated after pressing.
Nesting, or ganging, means arranging multiple designs on one print page to reduce paper waste and improve production efficiency.
In most sublimation transfer workflows, yes. Artwork is normally mirrored so that it appears correctly after being pressed onto the blank.
A good sublimation print page saves paper, reduces errors and makes production easier. Start with the correct canvas size, leave a safe margin, nest artwork properly and keep your colour and print settings consistent.