
A good sublimation template helps you design artwork that actually fits the blank, covers the edges properly, avoids important details being cut off and makes repeat orders much easier.
This guide explains how to measure sublimation blanks, calculate bleed, set up a 300 DPI design canvas and create safe guide layers for rigid blanks such as phone case inserts and soft blanks such as mouse pads.
A sublimation blank template is a correctly sized design file for a specific product. It tells you the printable area, the bleed area and any important obstructions such as camera holes, rounded corners, seams, stitching or edges that may be lost during pressing.
The template is not only the visible size of the blank. It should also include extra artwork beyond the edge of the product, called bleed, so the final pressed item is fully covered even if placement is slightly imperfect.
For this guide, we will use two practical examples: a rigid aluminium phone case insert and a soft mouse pad. These show why different products need different bleed allowances.
The goal is simple: create a reusable template that lets you drop in artwork, check the safe area, export a clean print-ready file and avoid white edges or badly placed design elements.
Measure the actual printable area of the blank, not just the product listing size or packaging size.
Add extra artwork beyond the edge of the blank to allow for placement, pressing and material movement.
Add guides or guide layers for holes, rounded corners, seams and areas where important artwork should not sit.
Bleed is extra artwork added outside the finished product size. It helps prevent blank white edges if the print is positioned slightly off centre or if the material moves during pressing.
| Blank type | Typical behaviour | Suggested bleed | Examples |
|---|---|---|---|
| Rigid blanks | Stable size with minimal movement, expansion or compression. | About 2mm per side | Aluminium inserts, hardboard panels, metal blanks, acrylic-style inserts. |
| Soft blanks | Can compress, stretch, expand or shift slightly during pressing. | About 5mm per side | Mouse pads, neoprene, fabric, stubby holders, soft mats. |
| Curved or wrapped blanks | Alignment can be harder because the artwork wraps around a curve. | Often 2–5mm or more depending on product | Mugs, tumblers, bottles, conical mugs and tapered blanks. |
Bleed is the extra artwork outside the finished product edge. The safe area is the area where important text, faces, logos and key details should stay so they are not lost at edges, cutouts or corners.
For this example we are using an iPhone 15 Pro Max aluminium or tempered glass style sublimation insert. The same method applies to other phone case insert blanks: measure the insert, add bleed, then create guide layers for the camera hole and unsafe areas.
Place the insert on a flat surface and measure the area that will receive the print, top to bottom and left to right. In this example, the insert is approximately 75mm × 158mm.
Because this is a rigid substrate that does not significantly expand or contract during pressing, we suggest adding 2mm bleed on the top, bottom, left and right.
Width: 75mm + 2mm left bleed + 2mm right bleed = 79mm
Height: 158mm + 2mm top bleed + 2mm bottom bleed = 162mm
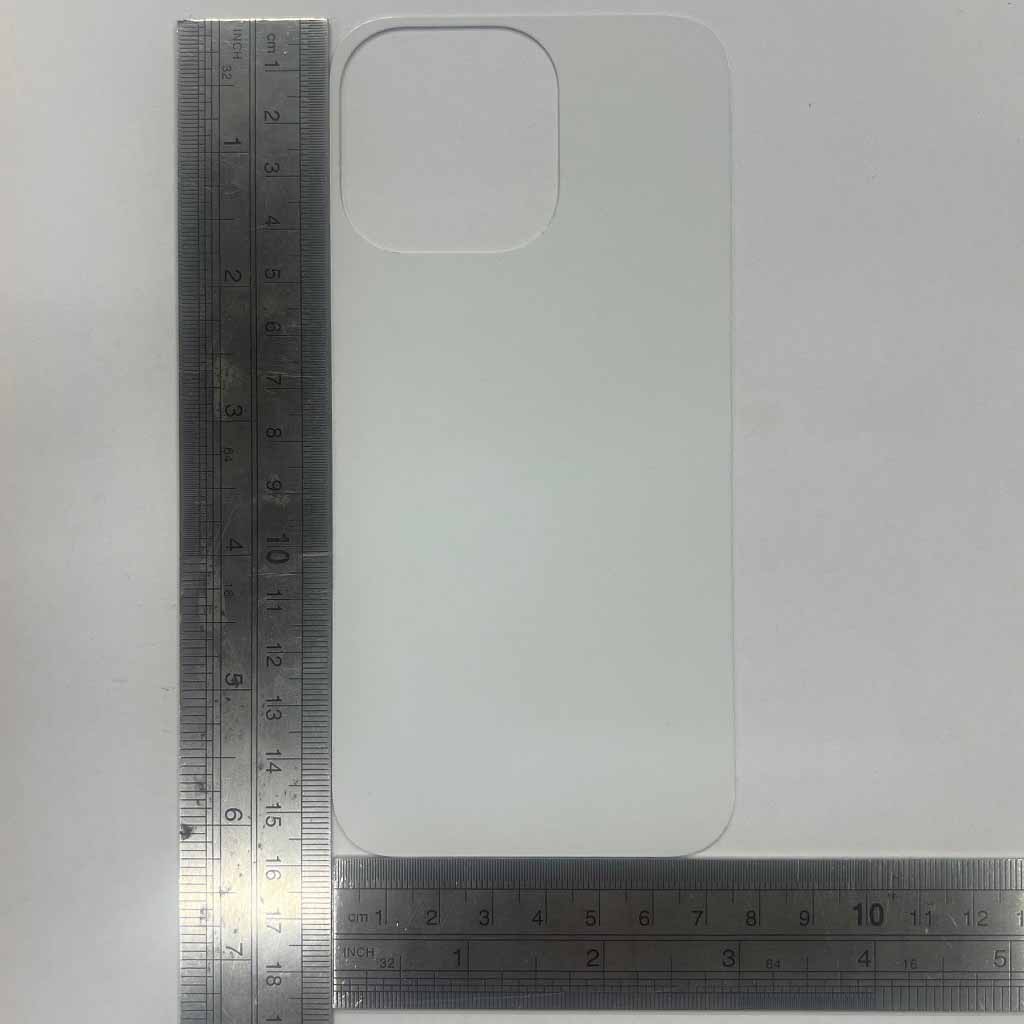 Measure the phone case insert itself, not only the phone model name.
In Photoshop, Illustrator, Affinity, Canva Pro or your preferred design program, create a document at approximately 79mm × 162mm, set to 300 DPI.
Use a transparent background if your software supports it. Save the editable master file with a clear name such as Apple iPhone 15 Pro Max 6.7 Sublimation Insert Template.
Add guide lines 2mm in from each edge. Anything outside those guides is bleed. It is there to cover the edge and should not contain important artwork.
Keep faces, text, logos and key design elements inside the safe area rather than at the outer edge of the canvas.
Measure the camera cutout and draw it as a separate guide layer. In this example, the camera area is approximately 42mm square and starts around 3mm from the edge of the physical insert.
Because the template includes 2mm bleed, place the camera guide about 5mm from the canvas edge. This helps you see what artwork may be lost or hidden by the phone case camera opening.
Keep the camera hole, bleed border and safe area as separate layers that can be turned on and off. Turn guides on while designing and checking, then turn them off before exporting the final print file unless you intentionally want a template overlay.
 Example Photoshop setup for a sublimation template file.
 Measure the camera cutout and create a separate guide layer.
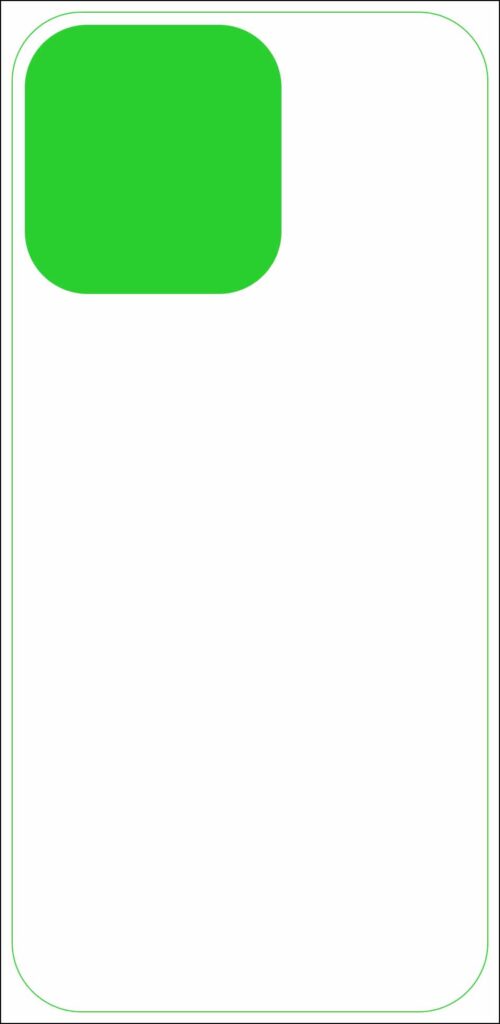 Example JPG template for an iPhone 15 Pro Max sublimation insert.
You can download the example Photoshop template for the Apple iPhone 15 Pro Max 6.7 sublimation insert below.
Phone case suppliers can change insert dimensions between batches. Always measure your current blank before relying on an older template.
Mouse pads are a good example of a soft sublimation blank. They compress under heat press pressure and may move slightly, so they generally need more bleed than a rigid phone case insert.
Place the mouse pad on a flat surface and measure the printable area from left to right and top to bottom. In this example, the mouse pad is approximately 252mm × 200mm.
Because the mouse pad is a soft substrate, we suggest adding 5mm bleed on each side.
Width: 252mm + 5mm left bleed + 5mm right bleed = 262mm
Height: 200mm + 5mm top bleed + 5mm bottom bleed = 210mm
 Measure the printable mouse pad surface before creating your template.
Create your design file at 262mm × 210mm and 300 DPI. This includes the measured mouse pad size plus 5mm bleed on each side.
Add guide lines 5mm in from each edge. Keep important artwork inside those guides and allow background colours or patterns to extend to the full canvas edge.
Measure the rounded corners and create a corner guide layer. In this example, the rounded corners are approximately 5–6mm.
Use this layer to check that text, logos and important image elements are not positioned where the corners will be cut or compressed.
Keep the corner and bleed guides in the editable file, but turn them off before saving your final print file unless you are intentionally creating a template preview.
 Example mouse pad template with corner and bleed allowance.
You can download the example Photoshop template for this mouse pad size below.
Soft blanks can compress, stretch or shift under pressure. Always test new batches before producing customer orders.
Check that background artwork extends to the full bleed edge. Then check that text, logos, faces and important details are safely inside the safe area.
Turn off visible guide layers before exporting the final print file. Save your editable master separately so you can reuse it for future designs.
If the artwork stops exactly at the measured product edge, even tiny placement errors can leave white edges after pressing.
Backgrounds should extend into the bleed, but logos, faces, text and fine details should stay inside the safe area.
Camera holes, seams, curves and rounded corners can hide or remove artwork if they are not added as template guides.
Product dimensions can vary between batches. Measure the actual blank you are printing, especially for production jobs.
A template created at the wrong size or low resolution may look fine on screen but print incorrectly or appear soft.
Keep an editable master file with layers. Export flattened files only for printing or sharing.
These related guides help connect the template setup process with print page setup, file formats and artwork preparation.
Bleed is extra artwork added beyond the final product edge. It helps prevent white edges if the print is slightly misaligned or the blank shifts during pressing.
For many rigid blanks, about 2mm per side is a practical starting point. Always test your specific blank and press workflow.
For soft blanks such as mouse pads or neoprene products, about 5mm per side is often a better starting point because the material can compress or shift during pressing.
Yes, 300 DPI is a good standard for most sublimation templates and print-ready artwork. It helps maintain sharp output at the correct physical size.
Usually no. Keep them as editable guide layers, turn them on while checking artwork placement, then turn them off before exporting the final print file.
Not always. Similar products can vary between suppliers and batches. Measure the actual blank before using an old template for production.
Measure the blank, add the right bleed, protect the safe area and keep guide layers editable. A good template saves time, reduces misprints and makes repeat orders much easier.